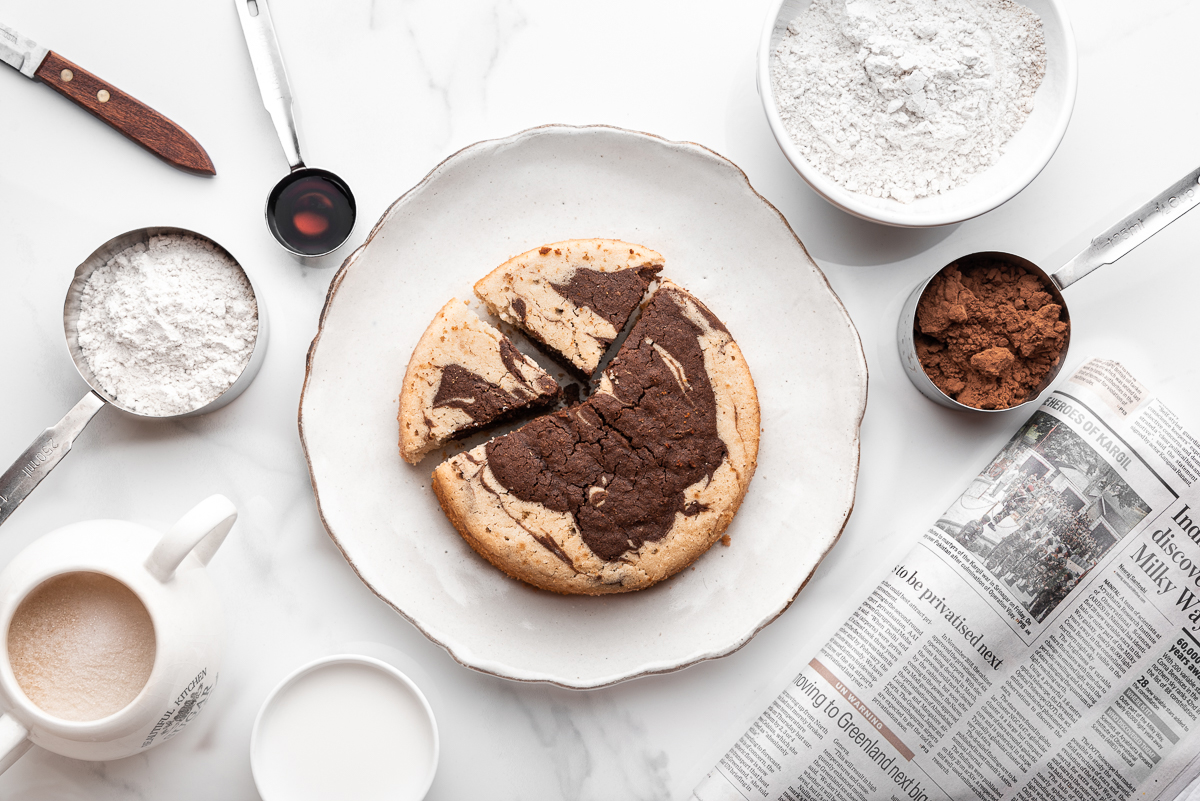
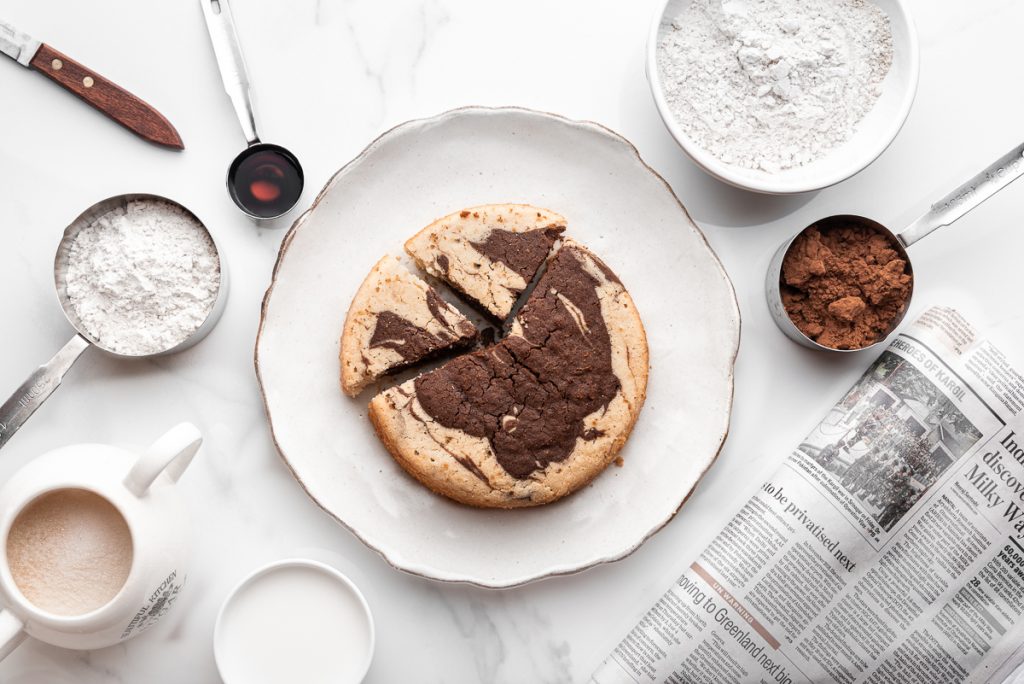
Glutenfree Eggless Vanilla & Chocolate Marble Cake Cooked In the Pressure cooker:
My oven isn’t working properly plus I love to do crazy things in the kitchen so decided to give this a go. Loved the way this cake turned out, I feel it is better than the oven 🙂
One TIP I would like to give, I am not a huge fan of GF maida so I do not use this as an ingredient often. If you are like me and don’t like the starchy flavor of the GF maida then I suggest you add some cinnamon powder or a dash of lemon or a few extra drops of vanilla to the recipe. But then again it is totally upto your taste.
————————————————————————————————————————————————-
Ingredients:
- GF all-purpose flour: 1.5 cups
- Butter: 100 gms (almost I stick of small butter)
- Powdered sugar: 1 cup
- Vanilla essence: 1tsp (fresh vanilla pod will be even better)
- White vinegar: 1 tsp (this will make your eggless cake fluffy)
- Baking powder: 1 tsp
- Baking soda: 1/2 tsp
- Chocolate/cocoa powder: 1/4 cup
- Milk: 1 cup or more depending on your GF flour blend (i added almost 1 cup + 3 tablespoon milk)
Other Essentials:
- Pressure cooker: big enough to accommodate your cake tin.
- Cake pan
- A metal ring or a small metal something to adjust the cake tray inside the cooker. (I used a small pie baking container. Put it at the base of the cooker and adjust the cake tin on top of it.)
Method:
- Take a pressure cooker. Remove the whistle and leave it on the gas stove to heat up with the lid on. Now whisk together the butter, sugar in a bowl.
- Add in the vanilla and vinegar. Whisk them properly. I suggest an electric hand blender will be very good for this as i used one and the result came out very good. If you don’t have a hand blender then use a whisk and put all your strength to whisk the mixture properly.
- Add the GF flour. Make sure you do not add them all together. I suggest before adding the flour you sieve it first. This makes the flour lighter for the cake.
- After you have added the flour into the mixture, use a spatula to mix them.
- Add milk to this mixture and mix it nicely. Make sure the batter should eventually becomes like cake batter. Slightly runny but not too thin.
- DIVIDE the batter into two parts.
- Part 1: will remain vanilla batter.
- Part 2: to the vanilla, batter add the cocoa powder. Mix well If it feels too dry add some milk to make sure the cocoa powder mixes with the batter properly.
- Now you have two types of batter. 1. white vanilla batter and 2. brown chocolate batter.
- Pour the batter into the baking dish.
- make sure the baking dish is brushed with some butter else the cake would stick.
- Now put one scoop of vanilla batter in middle. After that one scoop of chocolate batter. Alternate this till you run out of batter. If the batter doesn’t spread on its own then use a toothpick and make a swirl into the batter.
- Time to bake: remove the lid of the pressure cooker, place the baking tray on the stand that you have placed inside the cooker. (A metal ring or a small metal something to adjust the cake tray inside the cooker. I used a small pie baking container. Put it at the base of the cooker and adjust the cake tin on top of it.)
- Now close the lid. Make sure there is no whistle attached.
- Bake for 30-35 mins – low to medium flame.
- Check after 35 mins, your cake will be ready.
Glutenfree Eggless Vanilla & Chocolate Marble Cake Cooked in Pressure Cooker
Recipe by KhushbooCourse: Sweet Tooth2
servings25
minutes35
minutes1
hourIngredients
GF all-purpose flour: 1.5 cups
Butter: 100 gms (almost I stick of small butter)
Powdered sugar: 1 cup
Vanilla essence: 1tsp (fresh vanilla pod will be even better)
White vinegar: 1 tsp (this will make your eggless cake fluffy)
Baking powder: 1 tsp
Baking soda: 1/2 tsp
Chocolate/cocoa powder: 1/4 cup
Milk: 1 cup or more depending on your GF flour blend (i added almost 1 cup + 3 tablespoon milk)
Other Essentials:Pressure cooker: big enough to accommodate your cake tin.
Cake pan
A metal ring or a small metal something to adjust the cake tray inside the cooker. (I used a small pie baking container. Put it at the base of the cooker and adjust the cake tin on top of it.)
Directions
- Take a pressure cooker. REMOVE the whistle and leave it on the gas stove to heat up with the lid on. Now whisk together the butter, sugar in a bowl.
- Add in the vanilla and vinegar. Whisk them properly. I suggest an electric hand blender will be very good for this as i used one and the result came out very good. If you don’t have a hand blender then use a whisk and put all your strength to whisk the mixture properly.
- Add the GF flour. Make sure you do not add them all together. I suggest before adding the flour you sieve it first. This makes the flour lighter for the cake.
- After you have added the flour into the mixture, use a spatula to mix them.
- Add milk to this mixture and mix it nicely. Make sure the batter should eventually become like cake batter. Slightly runny but not too thin.
- DIVIDE the batter into two parts.
- Part 1: will remain vanilla batter.
- Part 2: to the vanilla, batter add the cocoa powder. Mix well If it feels too dry add some milk to make sure the cocoa powder mixes with the batter properly.
- Now you have two types of batter. 1. white vanilla batter and 2. brown chocolate batter.
- Pour the batter into the baking dish.
- make sure the baking dish is brushed with some butter else the cake would stick.
- Now put one scoop of vanilla batter in middle. After that one scoop of chocolate batter. Alternate this till you run out of batter. If the batter doesn’t spread on its own then use a toothpick and make a swirl into the batter.
- Time to bake: remove the lid of the pressure cooker, place the baking tray on the stand that you have placed inside the cooker. (A metal ring or a small metal something to adjust the cake tray inside the cooker. I used a small pie baking container. Put it at the base of the cooker and adjust the cake tin on top of it.)
- Now close the lid. Make sure there is no whistle attached.
- Bake for 30-35 mins – low to medium flame.
- Check after 35 mins, your cake will be ready.
How useful was this recipe?
Click on a star to rate it!
Average rating 4.7 / 5. Vote count: 199
No votes so far! Be the first to rate this recipe.






This Post Has 2 Comments
I hav tried this recipe so many times,it’s not at all complex. The cake is very fluffy and delicious. My kids just love it.Thanks Khushboo for sharing the recipe.
Hello!I am so glad you guys liked this cake. Sending you guys a tight hug.
Thanks!