Garlic bread has become an iconic and beloved side dish, capable of transforming an ordinary meal into an extraordinary culinary experience. One name that instantly comes to mind when thinking about delicious garlic bread is Domino’s Pizza. But what if you follow a gluten-free lifestyle? Fret not! In this comprehensive blog post, we delve into the origins of garlic bread, celebrate the irresistible appeal of Domino’s famous garlic bread, and unveil the secrets to creating an exceptional gluten-free version that rivals the original.
The Origins of Garlic Bread
Garlic bread traces its roots back to Italy, where the combination of fragrant garlic, rich olive oil, and crusty bread was first embraced. This simple yet delightful creation quickly spread across the globe, captivating the hearts and taste buds of food enthusiasts everywhere.
Recreating the Domino’s Magic – Gluten-Free Style
Creating gluten-free garlic bread that captures the essence of Domino’s irresistible flavors might seem like a daunting task, but fear not! With the right ingredients, techniques, and a dash of creativity, you can master the art of gluten-free garlic bread that stands toe-to-toe with the original. Here are some essential tips and tricks to ensure your gluten-free version is a resounding success:
Choosing the Right Gluten-Free Flour for Garlic Bread Sticks
Selecting a high-quality gluten-free flour blend is crucial for achieving the perfect texture and flavor. Look for a blend that combines various gluten-free flours, such as rice flour, tapioca flour, and potato starch, to create a well-balanced and versatile base for your bread.
Enhancing the Flavor Profile
To replicate the distinctive Domino’s garlic bread taste, infuse your dough with a generous amount of fresh garlic, fragrant herbs like parsley and oregano, and a drizzle of high-quality olive oil. These ingredients work in harmony to create the signature flavors that make Domino’s garlic bread so irresistible.
The Cheese Factor
Don’t underestimate the power of gooey, melted cheese! Sprinkle your gluten-free garlic bread with a blend of cheeses, such as mozzarella and Parmesan, to recreate the irresistible cheesy goodness that Domino’s is known for. Be generous with the cheese, allowing it to melt and form a delectable golden crust.
Ingredients:
- Sugar: 2 tsp
- Warm water: 1/4 cup
- Dry active yeast: 1 tsp
- Gluten-free all-purpose flour: 1 1/2 cups
- Salt: 1 tsp
- Minced garlic: 2 -3 tsp
- Organo, thyme mix: 2-3 tsp
- Extra virgin olive oil: 1 tbsp
- Grated cheese: 1 cup ( this depends on your preference for cheese, you can adjust the amount according to your liking)
- Bell pepper/ corn: 1/3 cup (optional)
Method
Step 1: Activate the Yeast
In a small bowl, combine the warm water and sugar. Stir until the sugar dissolves.
Sprinkle the dry active yeast over the water-sugar mixture.
Let it sit for about 5 minutes until the yeast becomes frothy.
Step 2: Prepare the Dough
In a mixing bowl, combine the gluten-free all-purpose flour and salt.
Make a well in the center of the dry ingredients and pour in the activated yeast mixture.
Add the minced garlic, oregano-thyme mix, and extra virgin olive oil to the bowl.
Mix everything together until a dough forms. If the dough feels too sticky, add a little more flour; if it’s too dry, add a splash of warm water.
Knead the dough for about 5-10 minutes until it becomes smooth and elastic.
Step 3: Let the Dough Rise
Lightly oil a clean bowl and place the dough in it.
Cover the bowl with a clean kitchen towel or plastic wrap.
Allow the dough to rise in a warm, draft-free area for about 1 to 2 hours until it doubles in size.
Step 4: Preheat the Oven and Prepare the Baking Sheet
Preheat your oven to 180C
Prepare a baking sheet by lining it with parchment paper or greasing it lightly with olive oil.
Step 5: Shape the Garlic Bread
Once the dough has risen, punch it down gently to release any air bubbles.
Transfer the dough onto a floured surface.
Cut it into two pieces to make 2 loaves. Roll each piece flat-circular like pizza dough.
Step 6: Add Fillings
Add the grated cheese, and sprinkle some herbs on one side of the dough. Then fold the other half and seal nicely.
If desired, you can add bell peppers or corn along with cheese.
Step 7: Bake
Bake in the preheated oven for approximately 20-25 minutes, or until the bread is golden brown and the cheese is melted and bubbly.
Please note, the baking time varies from one oven to another, keep an eye on your bread after 15 mins.
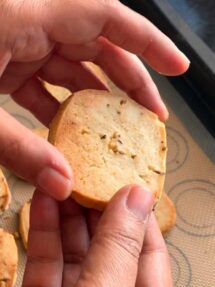
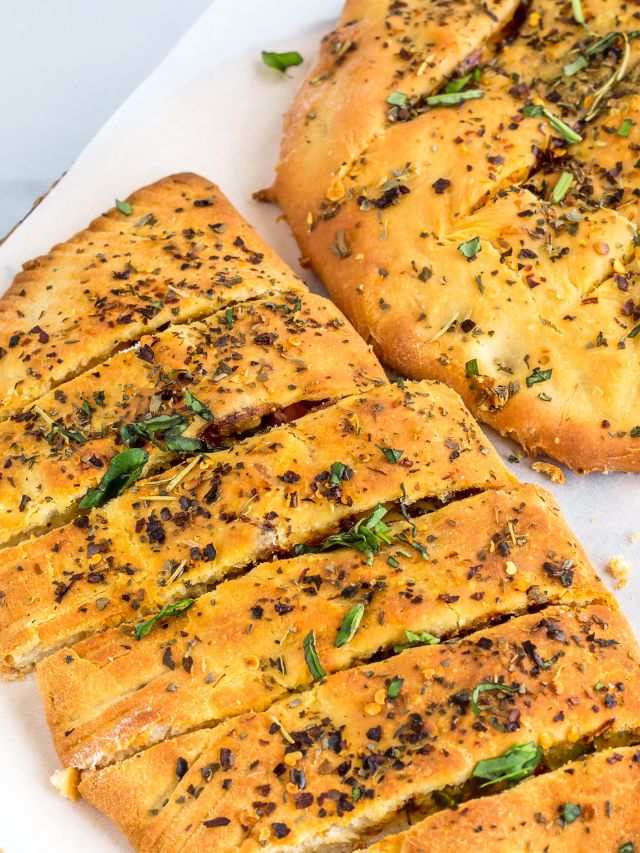
Step 8: Cool and Serve
Once baked, remove the garlic bread from the oven and let it cool on a wire rack for a few minutes.
Slice the bread into individual servings.
Serve the warm gluten-free garlic bread as a delightful accompaniment to a meal or as a tasty snack on its own.
How useful was this recipe?
Click on a star to rate it!
Average rating 4.9 / 5. Vote count: 11
No votes so far! Be the first to rate this recipe.